Why use acceptance testing?
A well-tested application measures the quality of the application and helps achieve good compatibility between the users and devices (iOS and Android devices in our case). To get the most out of our testing efforts and test coverage, a robust and cross-platform tool is required to automate the application. Appium is a pretty good choice which fits the bill.
Acceptance testing gives us confidence in two main areas: that new features have been built to the correct specification; and existing features continue to function after new integrations.
It’s notoriously difficult to prove that developers have built the feature they were asked for. One reason for this is that the use of natural language to describe feature specifications can result in ambiguities and misunderstandings between developers and stakeholders.
One approach being undertaken by a number of teams in International Engineering at JUST EAT is to produce executable specifications.
This has numerous benefits in terms of understanding the requirements of a project through user stories but, in particular, it give us specific steps that can be tested to verify a feature has been implemented correctly. These step sets are called scenarios, and capture the flow of a specific task that a user wants to perform.
The following are some examples from our own specifications…
| Scenario Outline: Make a successful order – Login to JUST EAT through Facebook Given I am on the home screen And I search for a restaurant And I add items to basket And I login through <social> account <email> and <password> When I checkout with cash payment Then the order should be placed successfully |social |email |password | |facebook |[email protected] |test | |
Scenario: View order details on Order History screen Given I am on the home screen And I have previously ordered from this device And I navigate to order history When I select an order |Test Restaurant | Then I am shown the details of that order |
These specifications are written in Gherkin syntax, which is supported by the Cucumber suite of test tools. The specific tools we chose to use are outlined in the next section.
Summary of technology
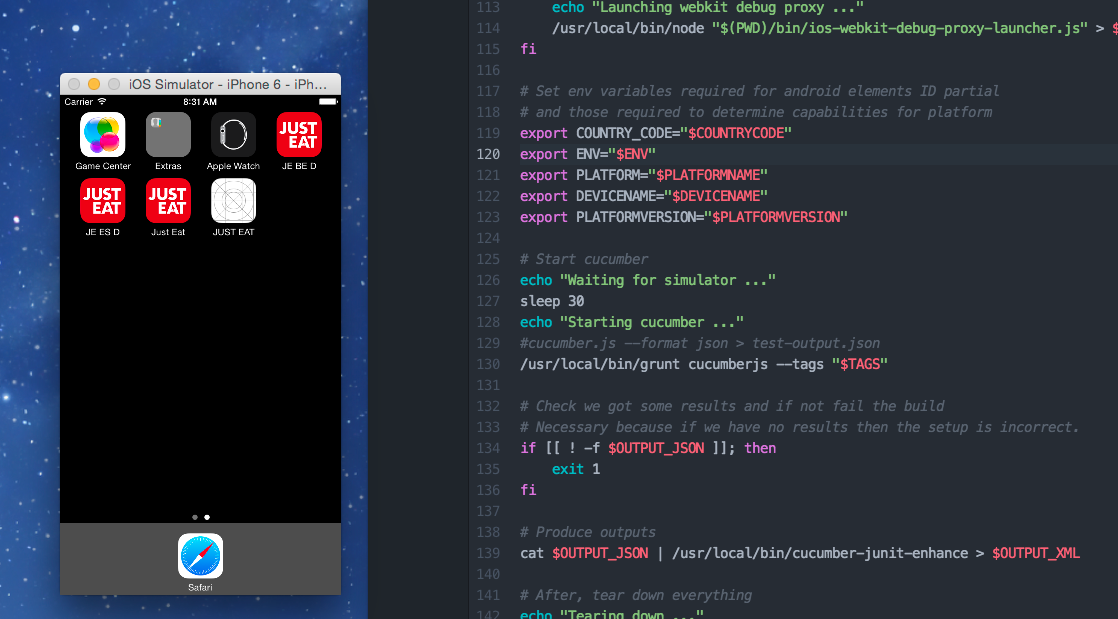
The iOS Webkit Debug Proxy allows access to webviews and their content. It provides an interface to the various components of a web page within a webview using the same contract as that used for the native application. For the JUST EAT app we use it to facilitate automation of the checkout flow so that we can enter delivery details, make an order and read the details of the order confirmation page.
As part of the initialisation of the Appium process, it launches the iOS Simulator. Appium communicates with the simulator using Apple’s UI Automation layer. This layer provides Javascript APIs to access the UI of the application at runtime. Appium then wraps this interface in another API that conforms to the JSON Wire Protocol. The benefit of using this abstraction is that it standardises UI access for different platforms meaning the same tests can be run for a variety of platforms.
While the Appium server provides the interface to access the UI of the running application, Cucumber JS is used to execute our scenarios defined in Gherkin syntax. The code that backs these steps contains the procedures to send commands to Appium.
NodeJS underlies most of the technologies listed above. NodeJS implements a non-blocking I/O model and an event loop that uses a single thread and performs I/O asynchronously. Mocha, Chai and Chai-as-Promised were among other modules used to provide additional testing support.
Page object model
Since we have the apps on iOS and Android platforms we created a single test suite which can run the same set of tests on both platforms, to avoid duplication of test code and save time, and Page Object Model helped us achieve this.
Page object models each represent a screen or group of controls in the user interface. For example, the home screen of the iOS app can be represented by a page object that provides a text field and a search button as its interactive elements. These elements can be obtained by ID, Xpath, Class name or by Name, and stored as properties on the model to be used during the test.
This adds a level of abstraction and the tests use an instance of the page object to interact with the UI elements rather than worrying about the element locators in the test itself. The abstraction is useful because the model is tightly coupled to the user’s perception of the user interface, and so is more appropriate for acceptance testing.
Another benefit is that we can add elements to a given model over time, as needed by the tests, instead of including all the elements on the screen that the tests do not interact with.
Below is a diagram of the test project structure, indicating where the page objects are located.
Acceptance-Tests
    |_ features
       |_ PageObjects
       |  |
       |  |_ Android
       |  |  |_ HomeScreen.js
       |  |  |_ MenuScreen.js
       |  |
       |  |_ iOS
       |     |_ HomeScreen.js
       |     |_ MenuScreen.js
       |
       |_ step_definitions
       |_ support
PageObjects/Android/HomeScreen.js
var HomeScreenObjects = function(){
   this.searchButton = {
        type: "id",
        value:”search_button"
    };
};
exports.homeScreen = HomeScreenObjects;
PageObjects/iOS/HomeScreen.js
var HomeScreenObjects = function(){
   this.searchButton = {
        type: “class name",
        value:”UIAButton"
    };
};
We direct the tests to use the page objects from the right folder, based on the platform we are running the tests on.
var pageObjectsPath = platform == "Android" ? "../PageObjects/Android/" : "../PageObjects/iOS/";
// Imports
var HomeScreen = require(pageObjectsPath + “HomeScreen.js").homeScreen;
this.clickSearchButton = function clickSearchButton(driver){
    var home = new HomeScreen();
    return this.driver
            .element(home.searchButton.type, home.searchButton.value)
            .click();
};
A potential issue with a cross-platform test suite is that you may have non-uniform UI designs across platforms. Luckily, our UX designers and developers make sure the flow is uniform across iOS and Android, meaning that we don’t have to add lots of “if(platform)” statements in the test code.
Continuous integration
A major use of automated acceptance test is verifying the validity of new and existing features during automated build processes. To this end, we created a new script that runs the tests on TeamCity.
The script itself takes a number of arguments to allow configuration of the test environment for different build jobs:
- Platform Name specifies which platform it runs on, i.e. iOS or Android.
- Device Name specifies the type of device to run on, e.g. iPhone 6 Plus, Samsung Galaxy S4.
- Platform Version allow a particular SDK to be targeted, e.g. iOS 7.1, Android 4.0.4.
- App Path specifies a path to the app executable under test.
- Environment was a custom option introduced to allow the selection of a particular QA environment, e.g. QA19, QA99, Staging.
- Country Code lets the tests know which flavour of the app is under test.
- Cucumber Flags allows some additional configuration to be passed to the grunt task runner.
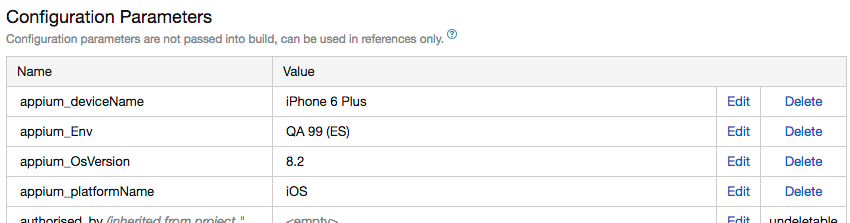
To integrate it with TeamCity we took the following steps…
- We created a new build template and added a number of configurable parameters for the script arguments.
- We added build features to allow consumption of the JUnit report and archiving of the HTML report.

- We added an artifact dependency to ensure that the most recent valid build would always be under test.

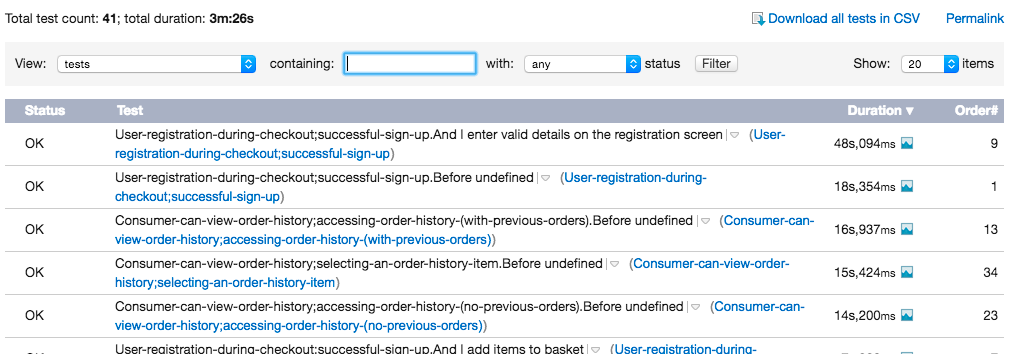
Reporting
Reporting test results is an important step in continuous integration as it allows tracking of test results over time, as well as providing a quick insight for interested parties without requiring them to read test metadata files such as XML and JSON.
We use a selection of Javascript tools to produce and convert the output of Cucumber JS. Grunt provides the framework in which to execute Cucumber JS and consume the test output, through a simple task runner with various configurable settings.
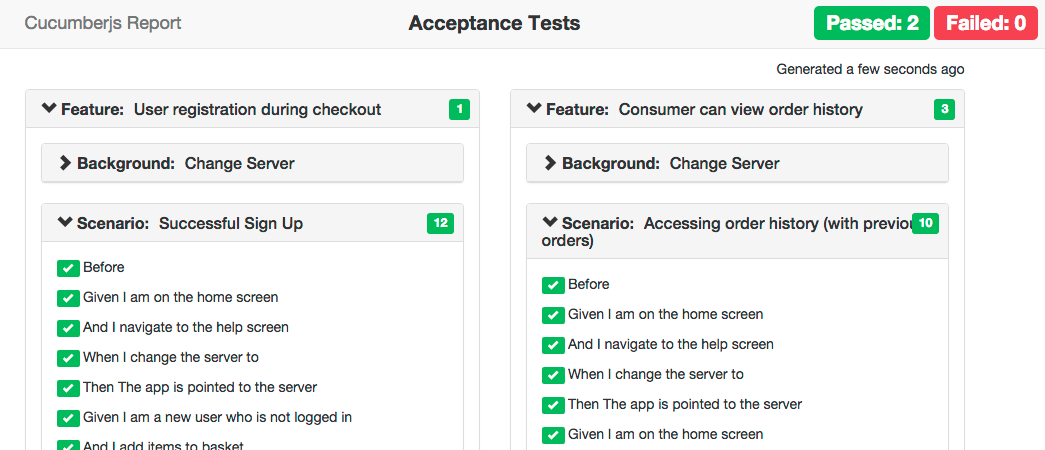
The JSON output produced is simple and readable but not necessarily compatible with continuous integration reporting tools. To this end we use protractor-cucumber-junit which converts the JSON into two formats:
- HTML provides a simple and readable page that any non-technical user can access for a quick overview of test results.
- JUnit XML is almost universally consumable by CI tools allowing native presentation of results in your CI front-end of choice, as well as enabling CI tools to track trends in testing over time, code coverage, and so on.
Simulation across platforms
iOS simulators are used, which are included as part of Xcode and hence can only be run from a mac. Xcode can run only one instance of instruments at a time and therefore, we cannot parallelise the iOS test run.
Genymotion is being used for Android emulators as it’s more promising than the Android emulator that comes with the Android sdk. Read an awesome blog on how to use Android emulators on CI, by Andrew Barnett, here [http://tech.just-eat.com/2015/02/26/using-android-emulators-on-ci/]
Problems and challenges
We’re using simulators and emulators to run our acceptance tests – as they give us more coverage in terms of devices and also an easy way to test any small changes. Nevertheless, not all types of user interactions can be tested on emulators and the iOS simulators in particular have problems with certain Appium gestures.
Further, during the test execution there are no real events like battery consumption and interrupts and hence, we do not get accurate results regarding the performance of the app. Since we are in initial stages of automating the apps, we find simulators/emulators as a good stop-gap while experimenting with continuous integration.
In the future it would be desirable to use a cloud-hosted service such as SauceLabs. This would allow tests to be run across many devices and OS versions in parallel.
Great blog post, congrats on achieving the holy grail of sharing test code between platforms with Appium!
What are your plans for the future of your automation suite, given that you’re not able to execute swipes and other gestures using Appium on iOS simulators? I find that it’s more valuable to run on simulators as it enables you to reset the app between scenarios, whereas on physical devices, where you’re able to execute all gestures, you aren’t able to get that independence of resetting between tests, (at least, I’ve not found a tool which allows you to do so) which makes the test run more brittle.
Comments are closed.