Overview
Like many other companies affected by lockdown, we needed to adapt to the new circumstances. That included distributing our CI build agents across our engineers’ homes. While mostly the new setup worked great, we faced a few challenges. This article outlines the solutions we used to help us further improve this service.
The agents were connected using VPN and, from time to time, we needed to log in to perform maintenance using VNC. We were using the agents’ IP addresses to connect, but these addresses were not always constant. The process of determining the correct IP address and connecting to the right machine was not as effective as we would have wanted.
We needed a change.
First, let’s go over what we are using currently:
- We have a folder of shortcuts to VNC connections (aka screenshares) for remote login
- Whenever a node stops responding, we ask their host (the closest engineer with physical access) to provide the new IP
- We update the corresponding shortcut in the folder
- We zip and send the folder to anyone that needs it
There are a few challenges with this approach that we intend to solve in this article:
- it’s hard to keep track of changing IP addresses
- we want to minimise our reliance on people manually updating information
Plus, we will have an excuse to learn new technologies (did somebody say Combine?)
These are the steps to automate our management of CI agents/nodes and solve the stated problems:
- determine how we can automate getting the IP addresses
- provide a way for people to quickly connect to a given node
- keep the data up to date
Let’s get started
Automate getting the IP addresses
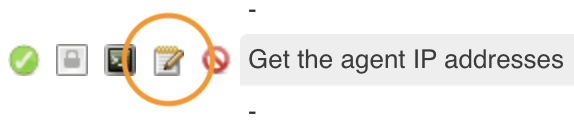
Let’s start with Jenkins. We are going to need Scriptler, so go ahead and install it if you don’t already have it. Scriptler enables you to write scripts in Groovy that can be executed on your Jenkins server and/or agents. Once installed, add a new script with an easy to remember id and name, which prints out a list of agent names and IP addresses.

You can use this as a starting point:
import hudson.util.RemotingDiagnostics;

def jenkins = jenkins.model.Jenkins.instance

def printIp(String name, String config) {
  def pattern = ~/10\.\d{1,3}\.\d{1,3}\.\d{1,3}/
  def matcher = config =~ pattern
  if (matcher.find()) {
    println name + ": " + matcher[0]
  }
}

for (node in jenkins.nodes) {
  host = node.computer
  def name = node.getDisplayName()
  if (node.getChannel() != null) {
    def config = RemotingDiagnostics.executeGroovy("\"ifconfig\".execute().text", node.getChannel());
    printIp(name, config)
  } else {
    println name + ": DISCONNECTED"
  }
}
In this script we are using ifconfig to get all the information for the network interfaces of the Jenkins agents and then printing just the IP address of each one. In order to extract the IP address, we are assuming all IP addresses in your corporate network start with 10 (e.g. 10.15.52.112). Ask your DevOps team for the submask your network is using.
Save and run your script to verify it is working correctly. Alternatively, you can open https://<your-jenkins-url>/scriptler/runScript?id=<your-script-id>.groovy (Don’t forget to replace <your-jenkins-url> and <your-script-id> with your values). The result should be something similar to the following:
Malory: 10.⎕.⎕.⎕
Pam: 10.⎕.⎕.⎕
Ray: 10.⎕.⎕.⎕
Sterling: 10.⎕.⎕.⎕
Cheryl: DISCONNECTED
Woodhouse: 10.⎕.⎕.⎕
The addresses are partial to protect our agents’ privacy.
So far so good. Next step is to use the results for accessing the nodes.
Generate Screenshares
Luckily we can do that using the Jenkins REST APIs. You need to create a token to use them. You can do that by going to https://<your-jenkins-url>/user/<your-user-name>/configure. After creating the token, run this in the terminal:
curl -X POST -L --user <your-user-name>:<your-api-token> https://<your-jenkins-url>/scriptler/run/<your-script-id>.groovyThe result will hopefully be very similar to the one above:
Malory: 10.⎕.⎕.⎕
Pam: 10.⎕.⎕.⎕
Ray: 10.⎕.⎕.⎕
Sterling: 10.⎕.⎕.⎕
Cheryl: DISCONNECTED
Woodhouse: 10.⎕.⎕.⎕
Try connecting to one of them by opening Finder, and pressing Cmd-K. Then type vnc:// followed by the IP address of the machine.
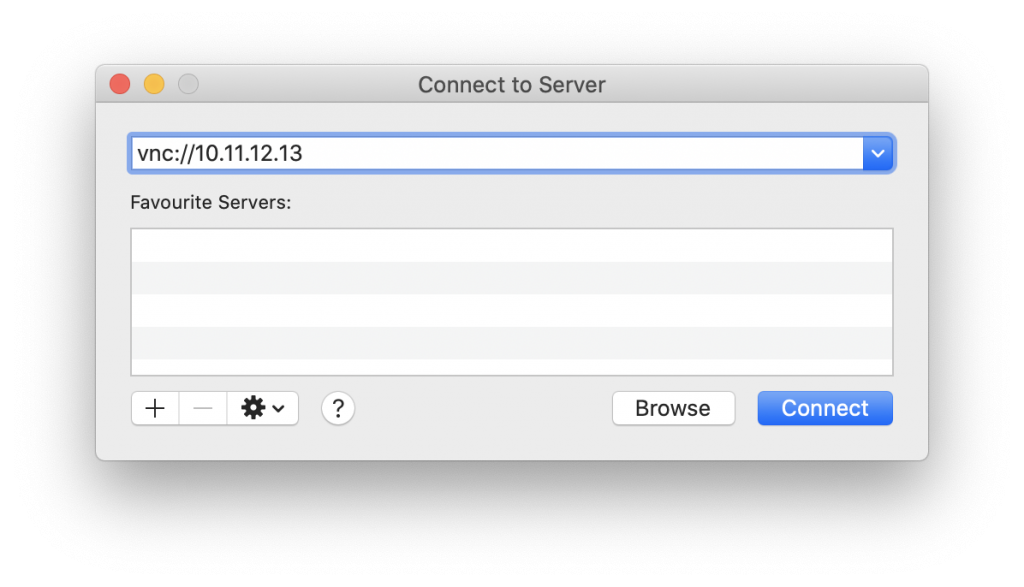
If that works, the next step is to create a shortcut (screenshare) so you wouldn’t have to go through Finder next time. Open a text editor (yes, vim is fine), and paste this (unmasking the address):
<?xml version="1.0" encoding="UTF-8"?>
<!DOCTYPE plist PUBLIC "-//Apple//DTD PLIST 1.0//EN" "http://www.apple.com/DTDs/PropertyList-1.0.dtd">
<plist version="1.0">
<dict>
        <key>URL</key>
        <string>vnc://10.⎕.⎕.⎕</string>
</dict>
</plist>
Save and double click to connect. Et voilà!
Now let’s create a script that automates the things we did so far. We will use what we know best – Swift. We will also streamline the process by using Apple’s open source framework Swift Argument Parser. The script should be pretty straightforward – connect to the API, get the data, and generate the screenshares. It should work like so:
$ generate_screenshares --user <your-user-name> \
 --token <your-api-token> \
 --url https://<your-jenkins-url>/scriptler/run/<your-script-id>.groovy
We will skip the trivial parts of the code for brevity. We create a new Command Line Tool project in Xcode, use SPM to import Swift Argument Parser, and paste this in the main.swift file.
import Foundation
import ArgumentParser
import Combine

var cancellable: AnyCancellable?

struct GenerateScreenshares: ParsableCommand {
    static let configuration = CommandConfiguration(abstract: "A Swift command-line tool to generate screenshares")

    @Option(name: .long, help: "Your username on Jenkins")
    private var user: String

    @Option(name: .long, help: "Your token on Jenkins")
    private var token: String

    @Option(name: .long, help: "The full URL to your Groovy script")
    private var url: String

    func run() throws {
        let client = JenkinsAPIClient(user: user, token: token, scriptUrl: url)
        cancellable = client.nodes()
            .receive(on: RunLoop.main)
            .sink { result in
                switch result {
                case .failure(let error):
                    print(error)
                    GenerateScreenshares.exit(withError: error)
                case .success(let rawNodeString):
                    let allNodes = rawNodeString
                        .components(separatedBy: .newlines)
                        .filter { $0.count > 0 }
                        .map { str -> (name: String, ip: String) in
                            let components = str.components(separatedBy: .whitespaces)
                            return (name: components[0], ip: components[1])
                        }
                    for node in allNodes {
                        let fileContents = screenshare(ip: node.ip)
                        let fileManager = FileManager.default
                        let filePath = fileManager.currentDirectoryPath.appending("/\(node.name).vncloc")
                        fileManager.createFile(atPath: filePath,
                                               contents: fileContents.data(using: .utf8),
                                               attributes: nil)
                    }
                    GenerateScreenshares.exit()
                }
            }
    }
}

func screenshare(ip: String) -> String {
"""
<?xml version="1.0" encoding="UTF-8"?>
<!DOCTYPE plist PUBLIC "-//Apple//DTD PLIST 1.0//EN" "http://www.apple.com/DTDs/PropertyList-1.0.dtd">
<plist version="1.0">
  <dict>
    <key>URL</key>
    <string>vnc://\(ip)</string>
  </dict>
</plist>
"""
}

GenerateScreenshares.main()
RunLoop.main.run()
Our JenkinsAPIClient class is inspired by Vadim Bulavin’s article Modern Networking in Swift 5 with URLSession, Combine and Codable. It goes something like this:
class JenkinsAPIClient {
    private let session: URLSession = URLSession.shared
    private let user: String
    private let token: String
    private let scriptUrl: String

    init(user: String, token: String, scriptUrl: String) {
        self.user = user
        self.token = token
        self.scriptUrl = scriptUrl
    }

    func nodes() -> AnyPublisher<Result<String, NetworkError>, Never> {
        let url = URL(string: scriptUrl)!
        let data = "\(user):\(token)".data(using: .utf8)
        let auth = data!.base64EncodedString()
        var request = URLRequest(url: url)
        request.httpMethod = "POST"
        request.addValue("Basic \(auth)", forHTTPHeaderField: "Authorization")

        return session.dataTaskPublisher(for: request)
            .mapError { error in
                NetworkError.invalidRequest(error: error)
            }
            .flatMap { data, response -> AnyPublisher<Data, Error> in
                guard let response = response as? HTTPURLResponse else {
                    return Fail(error: NetworkError.invalidResponse).eraseToAnyPublisher()
                }
                guard 200..<300 ~= response.statusCode else {
                    return Fail(error: NetworkError.dataLoadingError(statusCode: response.statusCode, data: data)).eraseToAnyPublisher()
                }
                return Just(data)
                    .catch { _ in Empty().eraseToAnyPublisher() }
                    .eraseToAnyPublisher()
        }
        .map { String(data: $0, encoding: .utf8)! }
        .map { .success($0) }
        .catch { error -> AnyPublisher<Result<String, NetworkError>, Never> in
            return Just(.failure(NetworkError.decodingError(error: error)))
                .catch { _ in Empty().eraseToAnyPublisher() }
                .eraseToAnyPublisher()
        }
        .eraseToAnyPublisher()
    }
}
We then compile the script and move it to a suitable folder. Running it without parameters will give us a nice help message.
Error: Missing expected argument '--user <user>'
OVERVIEW: A Swift command-line tool to generate screenshares
USAGE: generate-screenshares --user <user> --token <token> --url <url>
OPTIONS:
--user <user> Your username on Jenkins
--token <token> Your token on Jenkins
--url <url> The full URL to your Groovy script
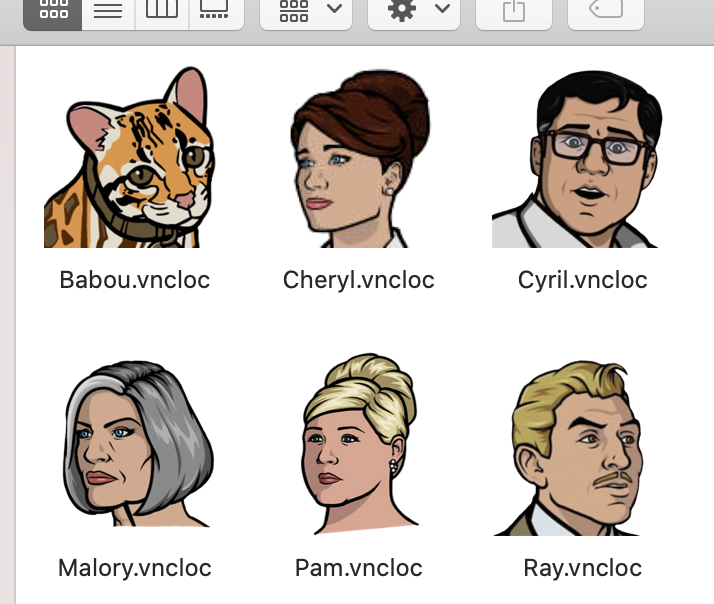
-h, --help Show help information.When we run it with proper credentials we get a folder containing the generated shortcuts.
$ ls
Babou.vncloc          Krieger.vncloc        Pam.vncloc            Sterling.vncloc
Cyril.vncloc          Lana.vncloc           Ray.vncloc            Woodhouse.vncloc
Katya.vncloc          Malory.vncloc         Ron.vncloc            generate_screenshares
Although the script we wrote is working great, we still have to manually share the generated files with our fellow engineers.
Let’s try a different approach.
A New Hope
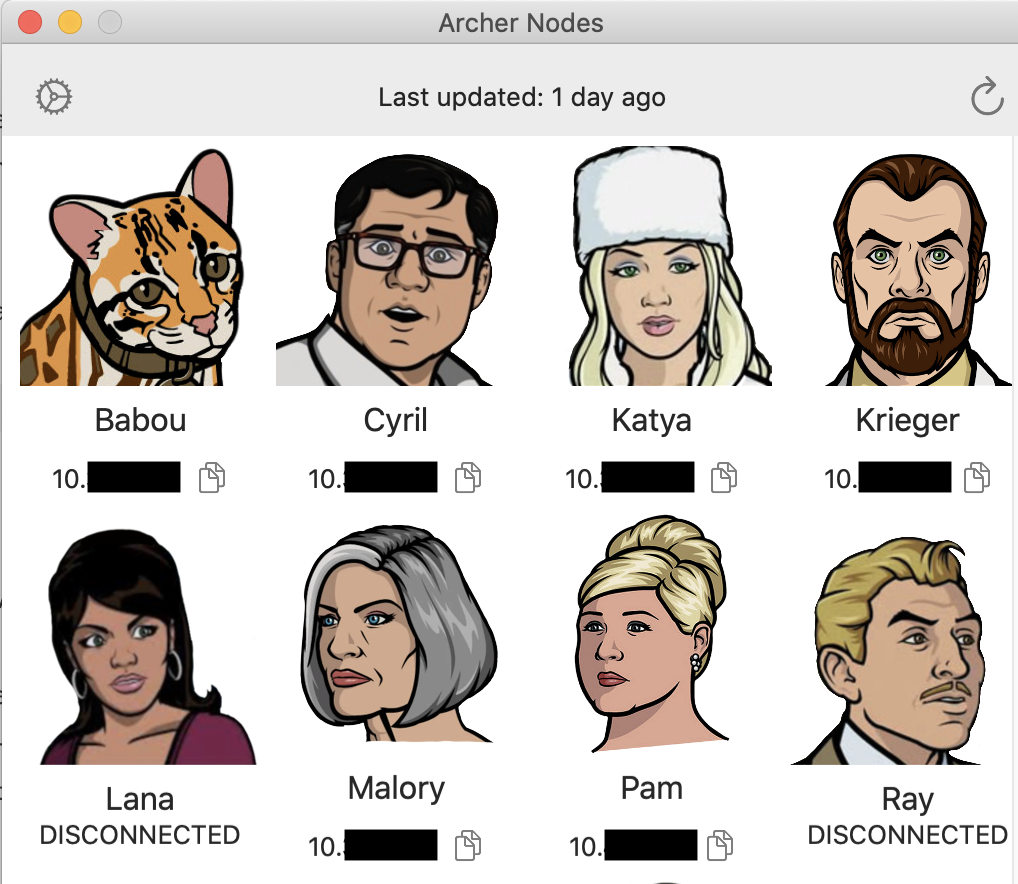
The remaining problem we need to solve is the disconnect between getting the IP addresses of the nodes and connecting to them. To solve that, let’s bring these two functions together and create a macOS app that both fetches the latest node data and triggers the connection to a node of our choice.
With the release of SwiftUI, Apple made that very easy for an iOS developer. We’ll skip parts of the implementation for brevity. The app is straightforward – get the user credentials, call the API, show the results in a nice way, job done. Let’s see the final result.
We are using the same JenkinsAPIClient we developed for the script earlier. We introduce a NodeManager class which our SwiftUI view will observe.
class NodeManager: ObservableObject {
    @Published var nodes: [[Node]] = []
    @Published var error: NetworkError?
    private var cancellable: AnyCancellable?
    var client = JenkinsAPIClient()

    func fetchNodes() {
        nodes = []
        error = nil
        cancellable?.cancel()
        cancellable = client.nodes()
            .receive(on: RunLoop.main)
            .sink { result in
                switch result {
                case .failure(let error):
                    self.error = error
                case .success(let rawNodeString):
                    let allNodes = rawNodeString
                        .components(separatedBy: .newlines)
                        .filter { $0.count > 0 }
                        .map { str -> Node in
                            let components = str.components(separatedBy: .whitespaces)
                            return Node(name: components[0], ip: components[1])
                        }
                    self.nodes = allNodes.chunked(into: 4)
                    Preferences.lastUpdated = Date()
                }
            }
    }
}
We also created a Preferences screen where the user can update their credentials. The inspiration for that came from the brilliant series SwiftUI for Mac by TrozWare.
The layout code is straightforward Swift UI stuff. We are listening for three events: a change in preferences, a click on the reload button, and the onAppear trigger. When any of them occur we are updating the view. We also have a timer which helps us visualise the time since we last updated the list. Some relevant code follows:
    @ObservedObject var nodeManager: NodeManager = NodeManager()
    @State private var relativeDate = "Just now"
    private let timer = Timer.publish(every: 1, on: .main, in: .common).autoconnect()
    private let preferencesChanged = NotificationCenter.default
        .publisher(for: .preferencesChanged)
        .receive(on: RunLoop.main)

...

        .onAppear {
            self.nodeManager.fetchNodes()
        }
        .onReceive(timer) { _ in
            self.relativeDate = Self.relativeFormatter.localizedString(for: Preferences.lastUpdated, relativeTo: Date())
        }
        .onReceive(preferencesChanged) { _ in
            self.nodeManager.fetchNodes()
        }
Considerations:
- Use Keychain to store sensitive data (e.g. the token)
- If the polling is time consuming, opt for a reload button instead. Don’t forget to display the last updated time, so the user can decide whether the data is stale
- Shoot for simplicity – list the nodes and link them using
vnc://links so that your nodes are one tap away - Handle the unhappy paths (e.g. bad credentials, node can’t be reached, no internet)
In summary
We created a macOS app which serves as a one-stop shop for connecting to our CI nodes. Our engineers can simply run the app, tap the node they want to log in to, and complete their task.
Along the way we also learned how to create a Swift script, which might come in handy later.
We used the latest technologies such as Swift UI, Combine, and ArgumentParser. This will hopefully encourage more people to adopt these technologies and improve their tooling.
References
- Header image by Joey Banks on Unsplash
- Straightforward, type-safe argument parsing for Swift
- Modern Networking in Swift 5 with URLSession, Combine and Codable
- SwiftUI for Mac – Part 1 :: TrozWare
Thank you for reading. You can reach out on Twitter at @gimly.